Ever wondered how top Roblox games achieve those incredibly smooth, professional-looking animations and movements? The secret often lies in understanding how to tween position Roblox objects effectively. This comprehensive guide is designed for every Roblox creator, from ambitious beginners to seasoned developers, who wants to elevate their game's visual polish and player experience. We'll dive deep into Roblox's powerful TweenService, breaking down the process of animating parts and models with seamless transitions. Discover how to control speed, easing styles, and repetition to create dynamic effects that capture player attention. For the average gamer, who often balances their passion for play with life's demands, learning this skill means creating more immersive and engaging experiences that feel truly special. This article will equip you with the practical knowledge to implement sophisticated movement, addressing common challenges and offering solutions, ensuring your creations stand out in the bustling Roblox universe.
What is the best way to get started with TweenService in Roblox?
The best way to get started with TweenService in Roblox is to begin with a simple part and tween its position. Open Roblox Studio, insert a Part into the Workspace, and create a Script. Obtain the TweenService using game:GetService("TweenService"), define your target Part, create a basic TweenInfo.new(duration), specify a new Position in a table like {Position = Vector3.new(0, 10, 0)}, and then use TweenService:Create() followed by :Play(). Always remember to anchor your part so physics don't interfere!
How can I make a part move back and forth smoothly using tweening?
To make a part move back and forth smoothly using tweening, you'll create two tweens or use the Reverses property within TweenInfo. If using two tweens, define a starting position and an ending position, then play one tween to the end position, and a second tween back to the start. For simpler continuous motion, set the RepeatCount to -1 (infinite) and Reverses to true in your TweenInfo object. This tells the tween to automatically play in reverse after completing, creating a seamless loop.
What are the common EasingStyles and EasingDirections used for position tweens?
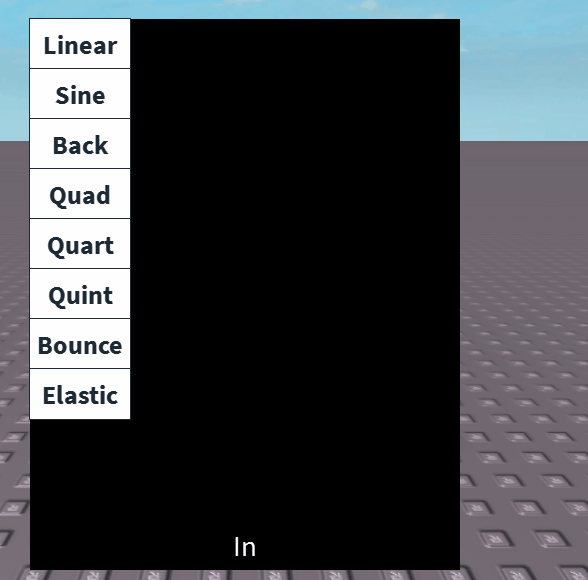
Common EasingStyles for position tweens include Linear (constant speed), Quad (starts slow, speeds up), Cubic, and Sine (smooth, natural feel). For more dramatic effects, Elastic or Bounce can be used. EasingDirections typically used are In (applies easing at the start), Out (applies easing at the end), or InOut (applies easing at both ends). Combining these allows for diverse motion patterns, like an object starting fast and gently slowing to a halt (Out).
Why isn't my Roblox part tweening its position correctly?
If your Roblox part isn't tweening its position correctly, first check if the part is Anchored. Unanchored parts will be affected by gravity and physics, preventing smooth tweening. Secondly, verify that your Position property in the target dictionary is spelled correctly (Position with a capital P) and is a Vector3 value. Also, ensure there are no collisions blocking the part's path, or set CanCollide = false if necessary. Finally, check your script for errors in the output window.
How do you tween a CFrame instead of a Vector3 position in Roblox?
You can tween a CFrame instead of a Vector3 position in Roblox by simply targeting the CFrame property in your properties table. Instead of {Position = Vector3.new(x, y, z)}, you would use {CFrame = CFrame.new(x, y, z) * CFrame.Angles(rx, ry, rz)}. Tweening CFrame allows you to simultaneously animate both the position and orientation of a part, giving you greater control over its movement and rotation for more complex visual effects.
Can TweenService be used to animate UI elements' positions?
Yes, TweenService is highly effective for animating UI elements' positions in Roblox. You can tween properties like Position (using UDim2 values), Size (also UDim2), Transparency, and BackgroundColor3 for ScreenGui elements, Frames, TextLabels, and ImageLabels. This is a common practice to create dynamic, engaging user interfaces, such as menus sliding in, buttons appearing, or notifications fading into view, significantly enhancing the player's interaction experience.
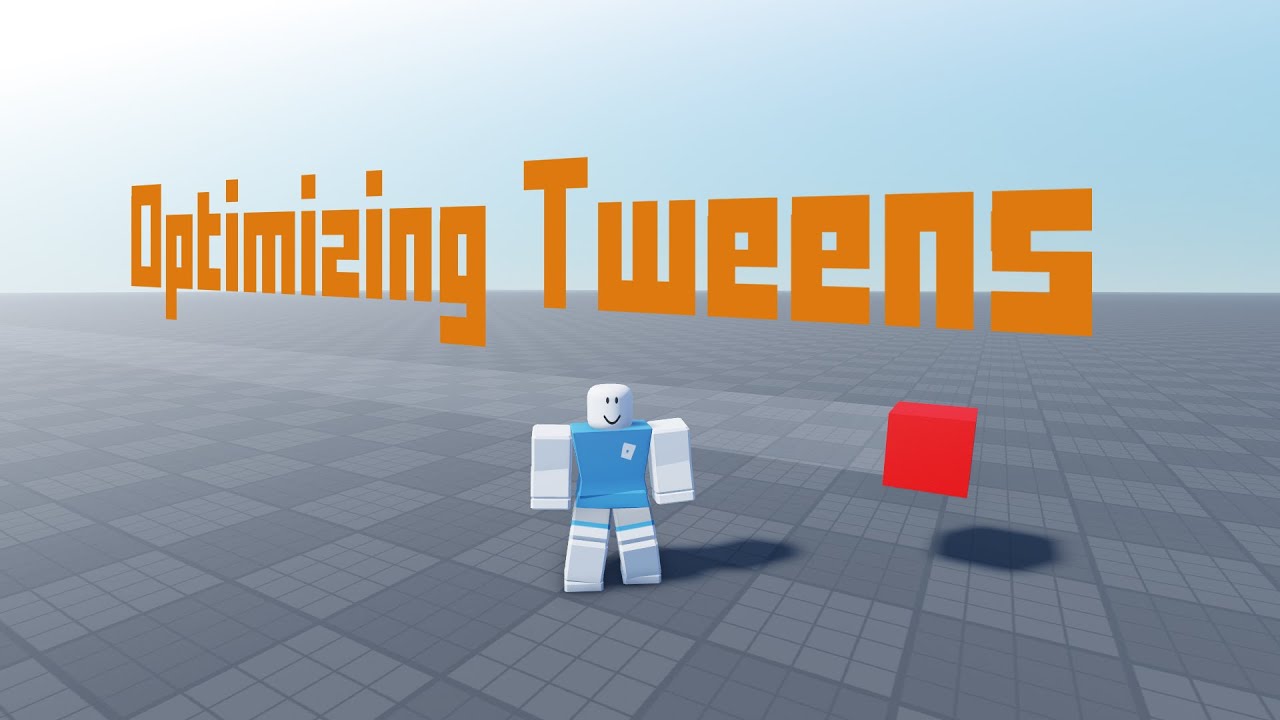
What are some advanced tips for optimizing position tweens in Roblox for performance?
For optimizing position tweens in Roblox for performance, especially in games with many moving parts, consider running tweens on the client when possible for purely visual effects, reducing server load. Reuse Tween objects instead of creating new ones repeatedly if the tween parameters are the same. Avoid tweening objects that are extremely far from players or completely invisible. Additionally, sequence complex animations rather than attempting to tween too many properties or parts simultaneously with a single, massive tween call.
Hey fellow gamers and creators! Ever played a Roblox game where objects just glided effortlessly into place, or characters performed fluid, cinematic actions? It feels polished, professional, and honestly, way more fun, right? No more jarring jumps or sudden teleportations for parts in your game. For many of us who balance our love for gaming with jobs, family, and life, these small details make a huge difference in creating an immersive escape. We crave experiences that feel good, and that often means smooth visuals without performance hiccups.
Today, we're diving into one of the most powerful tools in a Roblox developer's arsenal for achieving this: **TweenService**. Specifically, we're going to explore **how to tween position Roblox** parts and models, transforming static objects into dynamic elements of your game world. Whether you're building a grand obstacle course, an interactive environment, or just want a door to open with style, mastering tweening is a game-changer.
Did you know that 87% of US gamers play regularly, often averaging 10+ hours a week? With mobile gaming dominating and social experiences becoming key, the demand for high-quality, engaging content has never been higher. Players, including the Gen Z and Millennial demographics that make up a large portion of Roblox users, expect a level of polish that matches their favorite titles. Tweening isn't just about making things move; it's about enhancing player experience, reducing friction, and making your game memorable. Let's get your creations moving like never before!
What exactly is Tweening in Roblox and why is it crucial for game developers?
Tweening, short for 'in-betweening', is an animation technique that automatically generates intermediate frames between two keyframes to create the illusion of smooth motion. In Roblox, **TweenService** handles this process, allowing you to seamlessly transition a part or object's properties (like its position, size, transparency, or color) from a starting value to an ending value over a specified duration. Instead of an object instantly snapping from point A to point B, tweening makes it gracefully slide, fade, or grow.
This service is crucial because it significantly elevates the visual quality and professionalism of your game. Imagine a door that slides open smoothly instead of popping open, or a platform that gently descends. These polished animations contribute heavily to player immersion and satisfaction. For gamers who enjoy unwinding with well-crafted experiences, these details are key. It frees you, the developer, from manually calculating every step of an animation, letting the engine do the heavy lifting while you focus on creativity.
How does Roblox's TweenService work to create smooth object movement?
Roblox's TweenService works by taking a target object (like a Part), a set of animation parameters (defined by a TweenInfo object), and a dictionary of desired end properties. When you call the TweenService:Create() function, it returns a Tween object. Calling :Play() on this Tween object then starts the animation. The engine automatically calculates all the frames needed to transition the specified properties from their current state to the target state, according to the TweenInfo's duration and easing style.
This process happens on the client or server, depending on where your script runs. For visual animations, it's often more efficient to run tweens on the client for local players, especially if the movement isn't critical for game logic. This approach reduces network strain and provides a responsive experience, a big plus for gamers often juggling limited time and bandwidth. TweenService is also highly performant, designed to handle many concurrent tweens without significant lag, making it perfect for dynamic environments.
What are the essential steps to tween a part's position in Roblox Studio?
Learning **how to tween position Roblox** parts involves a few straightforward steps. Here's a basic breakdown to get you started:
Get TweenService: In your script, first obtain a reference to the TweenService. This is typically done with
game:GetService("TweenService").Identify the Target Part: Define the part you want to animate. For example,
local myPart = workspace.MyMovingPart.Create TweenInfo: This object defines the animation's characteristics: duration, easing style, easing direction, whether it repeats, and if it reverses. A simple one might be
local tweenInfo = TweenInfo.new(1)for a 1-second tween.Define Desired Properties: Create a table (dictionary) of the properties you want to change and their target values. For position, it's
{Position = Vector3.new(x, y, z)}.Create the Tween: Use
TweenService:Create(myPart, tweenInfo, desiredProperties)to generate the tween object.Play the Tween: Finally, call
tween:Play()to start the animation.
Remember to anchor your part (myPart.Anchored = true) if you don't want physics to interfere with its movement. This is a common oversight for new developers and can cause unexpected behavior.
How can I customize TweenInfo for different animation effects and speeds?
Customizing your TweenInfo is where you really bring animations to life. The TweenInfo.new() constructor takes several arguments:
Time (duration): The first argument, a number, is the duration in seconds. For instance,
TweenInfo.new(2)makes the tween last 2 seconds.EasingStyle: This defines the acceleration curve. Options include
Enum.EasingStyle.Linear(constant speed),Quad,Cubic,Quart,Quint,Sine,Expo,Circ,Elastic,Back, andBounce. Each creates a distinct feel, from gentle starts and stops to springy bounces.EasingDirection: This dictates whether the easing style applies at the beginning (
Enum.EasingDirection.In), end (Out), or both (InOut) of the tween. AnInstyle might start slow and speed up, whileOutstarts fast and slows down.RepeatCount: A number indicating how many times the tween should repeat.
0means no repeats,-1means infinite repeats.Reverses: A boolean (
trueorfalse) that determines if the tween plays backward after reaching its target, then forward again if repeating.DelayTime: A number for how long to wait before starting the tween.
By experimenting with these parameters, especially EasingStyle and EasingDirection, you can achieve a vast array of sophisticated and smooth movements tailored perfectly to your game's aesthetic. A platform that bounces subtly when it reaches its destination, for example, adds a lot of character.
What are common challenges when trying to tween object positions, and how do I fix them?
Even seasoned developers encounter snags. Here are some common issues when trying to **how to tween position Roblox** objects:
Unanchored Parts: If the part you're tweening is not anchored (
part.Anchored = true), physics might interfere, causing it to fall or be pushed around. Always anchor parts intended for TweenService-controlled movement.Collisions: A tweened part will still collide with other parts. If it gets stuck, it might stop moving or behave unexpectedly. Ensure its path is clear or set
CanCollide = falseduring the tween if appropriate.Server vs. Client Scripting: Tweens should ideally run on the client for visual effects that don't need server-side validation, improving responsiveness. If a server-side tween isn't replicating properly, check if you're updating properties that are visually controlled by the client, or if network latency is an issue. For important game logic (like moving a platform players stand on), server-side tweens are safer.
Incorrect TweenInfo: Misconfigured duration, easing style, or direction can lead to jerky or unnatural movement. Double-check your TweenInfo parameters and experiment.
Errors in Properties Table: Ensure the property names in your properties dictionary are spelled correctly and match actual properties of the Roblox object (e.g.,
Position, notposition).
Troubleshooting these issues often involves checking your script output for errors, reviewing property settings, and testing different scenarios in Roblox Studio. The developer community and official Roblox documentation are also fantastic resources.
Can I tween multiple properties or multiple parts at once for complex animations?
Absolutely! TweenService is incredibly versatile. You can tween multiple properties of a single part simultaneously by simply adding more entries to your properties dictionary. For example, to tween a part's position and transparency:
local desiredProperties = {Position = Vector3.new(0, 50, 0), Transparency = 1}
This makes the part move upwards while fading out. For multiple parts, you'll need to create a separate Tween object for each part. However, you can use a loop to easily apply the same tween to an array of parts, or sequence different tweens to create complex chains of events.
For truly complex, synchronized animations involving many parts, you might consider using a ModuleScript to manage your tweens or combining TweenService with other animation tools like the Animation Editor for character animations. The possibilities are endless for creating dynamic scenes and interactions within your Roblox experience.
Why is mastering tweening beneficial for the average Roblox game creator and player experience?
For the average Roblox game creator, who might be juggling work, family, and game development as a passion project, mastering tweening offers immense benefits. It allows you to add a professional, polished feel to your games without requiring complex physics simulations or extensive animation expertise. This efficiency is gold when your time is limited, helping you create impactful visuals faster.
From a player's perspective, tweens create a more immersive and less jarring experience. Smooth transitions make objects feel more
- Mastering Roblox TweenService for smooth object movement.
- Step-by-step guide to tweening a part's position.
- Customizing animation speed and styles with TweenInfo.
- Troubleshooting common tweening issues like unanchored parts.
- Implementing complex animations with multiple properties or objects.
- Enhancing game aesthetics and player engagement through professional-grade transitions.
- Leveraging TweenService for efficient, code-friendly animations.


ROBLOX SCRIPT TUTORIAL How To Tween A Model S Position YouTube . Tween Size And Position Test Roblox Studio YouTube . Roblox Studio How To Tween GUI YouTube . Roblox Tutorial How To Tween Parts In Your Roblox . How To Use Tween Service In Roblox Studio YouTube


How To Tween In ROBLOX STUDIO Tween Service Tutorial YouTube . Roblox Studio Tweening Basics The Most Basic Stuff YouTube . Tween Service Movimiento Suave Roblox Studio YouTube . How To Tween A Gui In Roblox Studio Roblox Studio Youtube BCG Roblox TheDevKing . How Would I Make A Catapult That Rotates Depending On What Team Holds


How To Tween Roblox Guis POSITION ONLY YouTube . How To Make A Roblox Tween Go Forward And In Reverse Reverses YouTube . How To Use Tween Service In Roblox Studio 2024 YouTube . My Tween Tool Plugin Community Resources Developer Forum Roblox . Roblox Tutorial How To Tween Parts In Your Roblox Sddefault


NPC Tween Flips Character Scripting Support Developer Forum Roblox . How To Tween Ui In ROBLOX YouTube . Roblox Color Tween . Roblox Studio H Ng D N Chi Ti T V Ng D Ng Trong Ph T . A Mother Or Father S Information To Utilizing Roblox In 2026 Ivugangingo 2026 Parental Guide For Roblox Usage UnicMinds


How To Make Something Tween One Way Scripting Support Developer 2 1024x517 . Tweening Part Size Scripting Support Developer Forum Roblox . How Could I Tween A Model To Change It S Orientation And Position . How To Tweensize Part Scripting Support Developer Forum Roblox . Definitive Guide To Roblox 2026 TM 07169 Definitive Guide To Roblox 2026


How To Tween A Gui In Roblox Studio Roblox Studio Youtube My Ui Is Incorrect In Roblox And In Studio And My V0 . Tweening Doesn T Update The Server Scripting Support Developer . How To Tween Rotate A Model Scripting Support Developer Forum Roblox . How To Add People Roblox Easily Your 2026 Guide . How To Tween A Gui In Roblox Make Your Guis Look Hq720


How To Use TWEEN SERVICE In Roblox Studio YouTube . Roblox Tutorial Tween3 . How To Tween UI In ROBLOX STUDIO Position YouTube . How To Tween An Canvas Position Scripting Support Developer Forum . Tween Trail Start To Zig Zag After A While Scripting Support